Your first endpoint
Turn a SQL query on the sample shop into a URL you can call. You need the quick start running with the
sample data loaded, and to be signed in as admin.
1. Create a workspace
- In the sidebar, under Administration, open Workspaces and press New workspace.
- Enter a Name (
Shop) and a Slug (shop). The slug is part of every endpoint URL and cannot change later. - Keep yourself as First owner and press Create workspace.
The workspace switcher at the top now shows Shop.
2. Connect the database
-
Open Datasources and press New datasource.
-
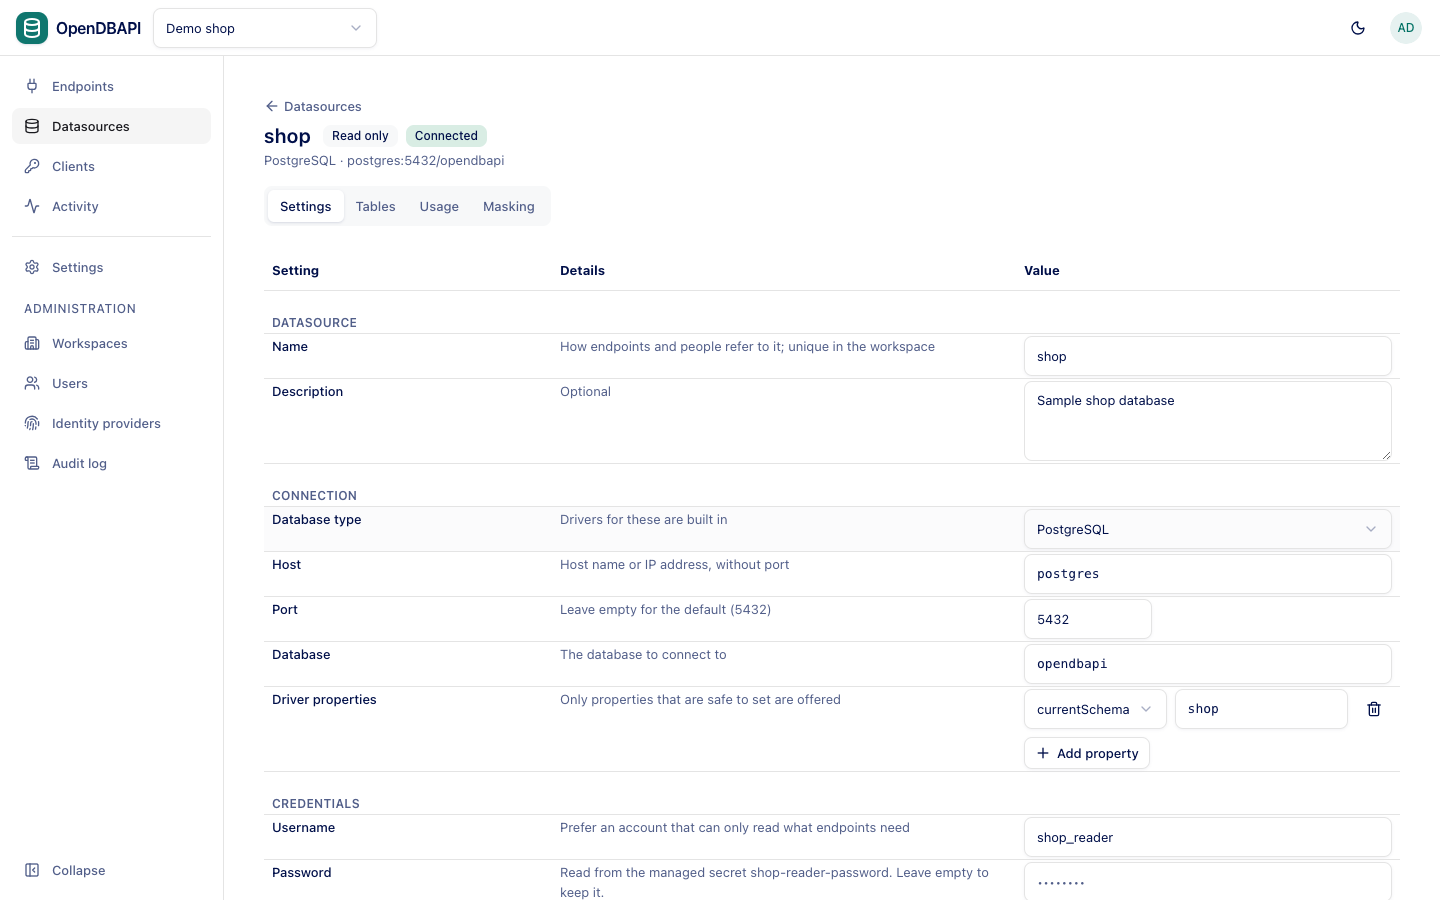
Fill in the Connection group:
Setting Value Name shopDatabase type PostgreSQL Host postgres(the database container's name on the Compose network)Port leave empty for 5432 Database opendbapi -
Under Credentials, set Username
shop_readerand Passwordshop-reader. -
Under Driver properties, press Add property and set
currentSchematoshop, so queries can writecustomersinstead ofshop.customers. -
Keep Read only on and press Test connection. When it says Connected., press Create datasource.
3. Write the endpoint
-
Open Endpoints and press New endpoint.
-
Name it
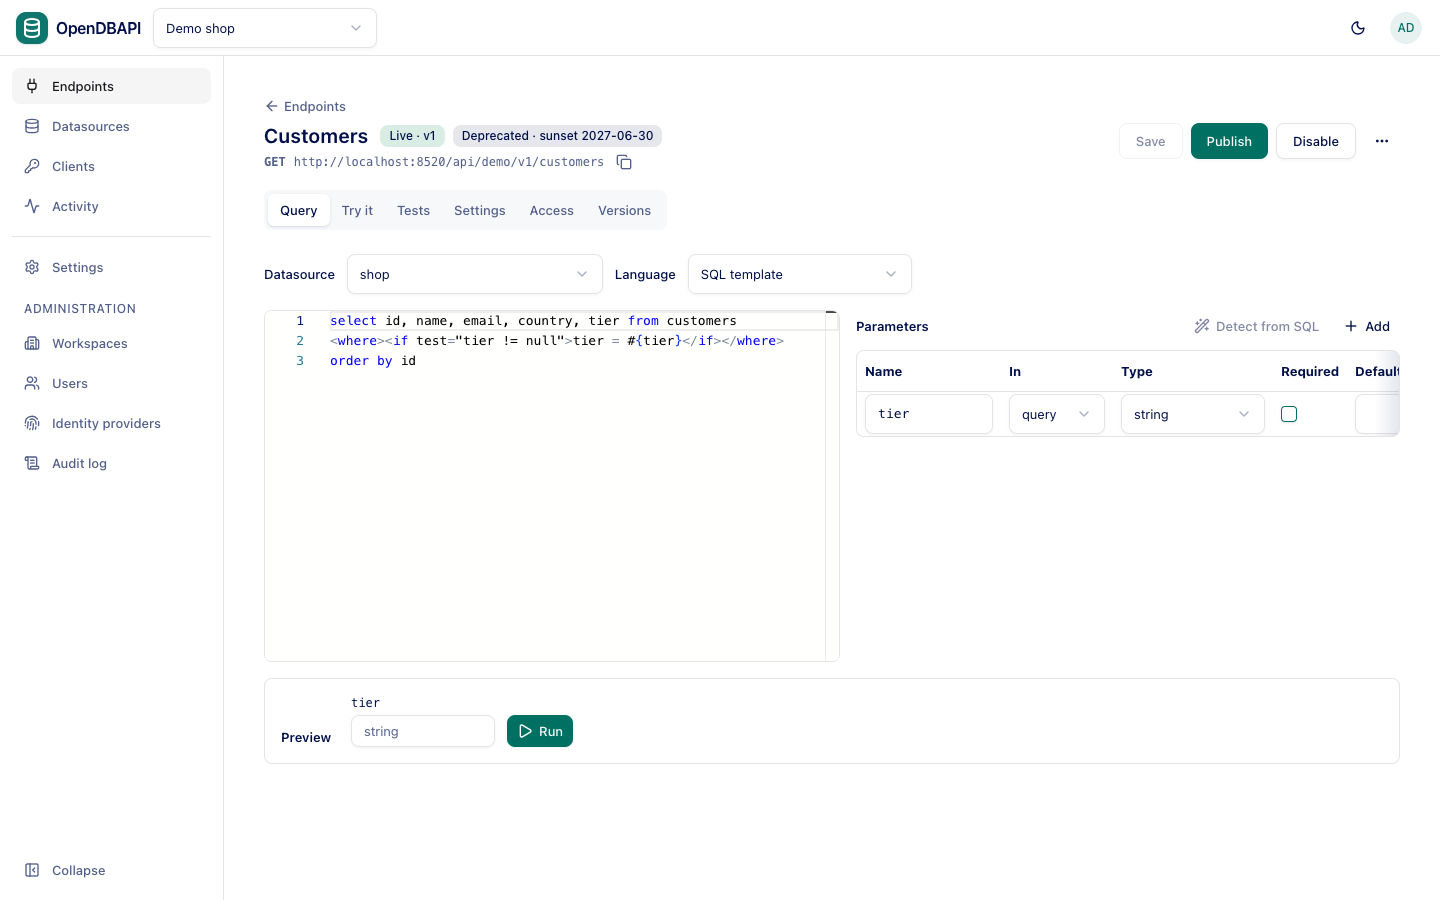
Customers, keep MethodGET, set Path tocustomers, choose theshopdatasource and keep Access on Private. Press Create and edit query. -
Replace the query with:
select id, name, country, tier from customers
<where><if test="tier != null">tier = #{tier}</if></where>
order by id#{tier}is a parameter, sent to the database as a bound value, never pasted into the SQL. The<where>and<if>tags add the condition only when a caller passestier. -
Press Detect from SQL next to Parameters: a
tierparameter of typestringappears. -
Under Preview, type
goldfortierand press Run. The two gold customers appear, together with the SQL that ran and its bound values.
4. Publish
Press Save, then Publish and Publish a new version. The header changes to Live · v1.
5. Call it
A private endpoint needs a token. Create one for a service account:
- Open Clients, press New service account, name it
tutorialand press Create. - Under Grants, press Grant access, choose the
Customersendpoint and press Grant. - Under Clients, press New client and Create client. Copy the Client id and Client secret. The secret is shown only once.
Exchange the client for a token, then call the endpoint:
TOKEN=$(curl -s -u "$CLIENT_ID:$CLIENT_SECRET" -d grant_type=client_credentials \
  http://localhost:8520/oauth2/token | jq -r .access_token)

curl -s -H "Authorization: Bearer $TOKEN" "http://localhost:8520/api/shop/customers?tier=gold"
{
  "data": [
    {"id": 1, "name": "Ada Lovelace", "country": "GB", "tier": "gold"},
    {"id": 2, "name": "Grace Hopper", "country": "US", "tier": "gold"}
  ],
  "meta": {"version": 1, "cached": false, "requestId": "cfbf7475-…"}
}
meta.version tells you which published version answered. Every call appears under Activity.
Next
- Write and publish endpoints: the editor, parameters and versions in detail.
- Calling endpoints: tokens, the response envelope and errors.
- Configuration as code: keep this workspace in Git.